
Understanding the Dryer Vent Cleaning Process: Duration, Expectations, and Results
- GJ Dryer Vents
- Jan 6
- 3 min read
Dryer vent cleaning is a crucial home maintenance task that often gets overlooked. Many homeowners don’t realize how much time it takes or what the process involves. A clogged dryer vent can reduce your dryer's efficiency, increase energy costs, and even pose a fire hazard. Knowing what to expect during a dryer vent cleaning appointment can help you prepare and ensure the job is done right.
This post breaks down how long dryer vent cleaning usually takes, what happens during the service, how airflow testing works, and the visible results you can expect before and after cleaning.
How Long Does Dryer Vent Cleaning Take?
The duration of a dryer vent cleaning appointment depends on several factors, including the length and complexity of the vent system, the level of buildup, and the type of equipment used. On average, most professional dryer vent cleanings take between 30 minutes and 1.5 hours.
Factors Affecting Cleaning Time
Vent length and layout: Longer vents with multiple bends or hard-to-reach areas take more time.
Amount of lint buildup: Heavy blockages require more thorough cleaning.
Access to vent openings: Easy access speeds up the process; vents hidden behind walls or ceilings take longer.
Type of dryer: Some dryers have more complex venting systems.
For example, a straightforward, short vent running directly outside might be cleaned in about 30 minutes. A vent running through multiple walls or attic spaces could take over an hour.
What to Expect During Your Dryer Vent Cleaning Appointment
Understanding the steps involved helps set clear expectations and reduces surprises during the service.
Step 1: Inspection
The technician begins by inspecting the dryer vent system. This includes checking the vent pipe, exhaust hood outside your home, and the dryer connection. They look for:
Lint buildup
Damage or disconnected sections
Blockages caused by pests or debris
Step 2: Preparation
The technician will move the dryer away from the wall to access the vent connection. They may also cover the floor or nearby surfaces to catch any falling lint or dust.
Step 3: Cleaning
Using specialized tools such as rotary brushes, air compressors, or vacuum systems, the technician cleans the entire vent pipe from the dryer to the outside exhaust. The tools break up and remove lint and debris that restrict airflow.
Step 4: Airflow Testing
After cleaning, the technician tests the airflow to ensure the vent is clear. This may involve measuring the air velocity at the vent outlet or using a smoke test to check for leaks or blockages.
Step 5: Final Inspection and Cleanup
The technician inspects the vent again to confirm it is clean and properly connected. They will also clean up any lint or dust around the dryer area and reposition the dryer.
Airflow Testing: Why It Matters
Airflow testing is a critical part of the dryer vent cleaning process. It confirms that the vent is clear and the dryer can operate efficiently and safely.
How Airflow Testing Works
Air velocity meter: Measures the speed of air coming out of the vent. A low reading indicates blockages.
Smoke test: Releases a small amount of smoke into the vent to detect leaks or areas where airflow is restricted.
Visual inspection: Confirms the vent is free of lint and debris.
Benefits of Airflow Testing
Ensures the dryer dries clothes faster, saving energy.
Reduces the risk of overheating and fire.
Identifies hidden issues like disconnected ducts or pest nests.

Before and After Results You Can Expect
The difference between a clogged and a clean dryer vent is significant. Here’s what you might notice:
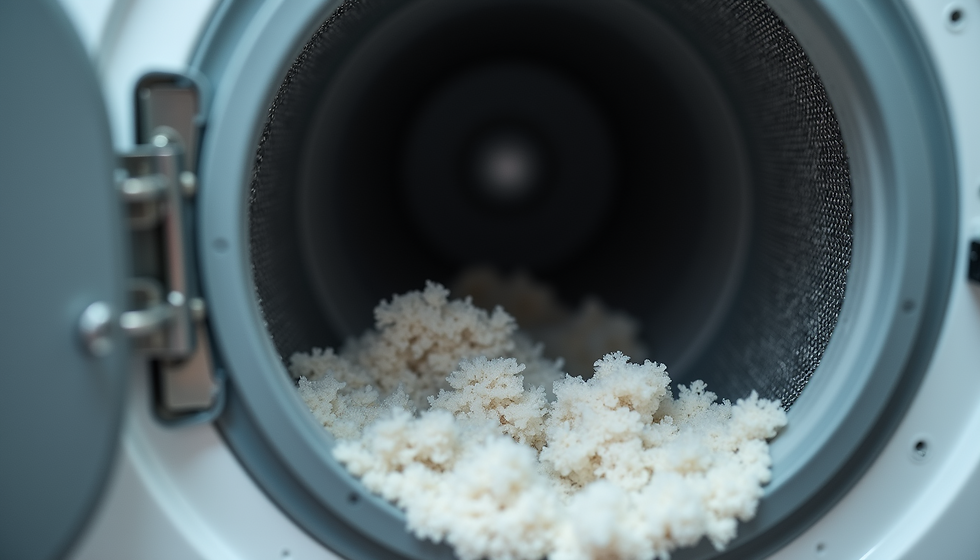
Before Cleaning
Clothes take longer to dry.
Dryer feels hot to the touch.
Lint buildup visible around the vent opening.
Musty or burning smell during drying.
Increased energy bills.
After Cleaning
Dryer dries clothes faster and more evenly.
Reduced heat buildup in the dryer.
Clear vent opening with no visible lint.
No unusual smells.
Lower energy consumption.
For example, one homeowner reported their drying time dropped from 90 minutes to 45 minutes after vent cleaning. This not only saved time but also reduced their electricity bill.
Tips for Homeowners to Maintain Dryer Vents
Keeping your dryer vent clean between professional services can extend its life and maintain safety.
Clean the lint trap after every load.
Check the vent opening outside for blockages or damage.
Avoid overloading the dryer.
Schedule professional vent cleaning every 1 to 2 years, or more often if you notice drying issues.
Dryer vent cleaning is a straightforward process that takes less than two hours in most cases but delivers significant benefits. Knowing what to expect during your appointment helps you prepare and ensures your dryer runs safely and efficiently. After cleaning, you’ll notice faster drying times, lower energy bills, and peace of mind knowing your home is safer.


Comments